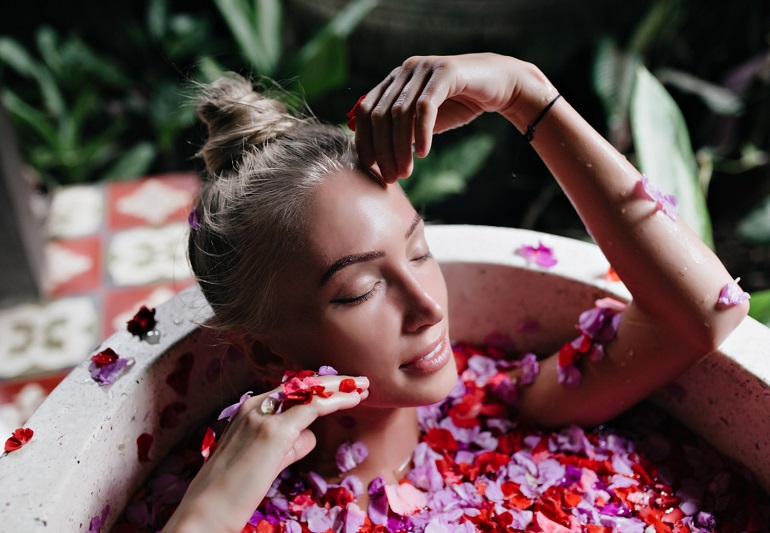
It all started over a cup of coffee on a lazy Monday morning. Priya and Meera, ladies from the same marketing team, were gossiping about their normal weekend activities. Meera’s attention was drawn to Priya’s face with its natural glow, and she asked the latter, “Alright, what’s the new product you are applying this time?”. Priya smiled back and replied, “Nothing from the store! I have been using a homemade DIY face cleanser.”
Meera, who had sensitive skin and breakouts due to commercial cleansers, was very curious. When Priya explained the details of mixing of gram flour, aloe vera, and honey, Meera understood that skincare did not need to be in a fancy bottle; it could also be in your kitchen.
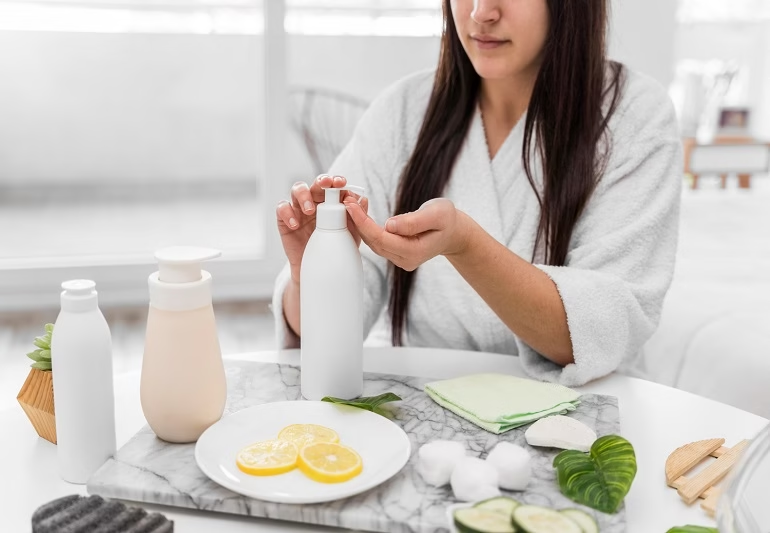
Their conversation turned into a mini skincare session where they shared laughter, debated the ingredients, and simultaneously wished to come up with something that would work on their skin. The issue with the DIY face cleanser is that it is a cleansing face and a means of getting back to earth, safe, and personalised care that knows your skin.
In this guide, we will cover every bit of information Priya told Meera, including how to make a DIY face cleanser of your own, customise it according to your skin type, and create a simple yet effective regimen that will leave your skin fresh, balanced, and radiant every day.
Benefits of Going Natural
Face cleansers that you make yourself provide control. You can tell precisely what is rubbing your doubts-no mystery blends, no preservative written in tiny type. You can customise textures (creamy, gel-like, powdery), smell (or no smell at all), and intensity (daily gentle or weekly deep clean). Bonus: it’s budget-friendly. One bag of oatmeal or gram flour will last longer than one bottle of cleanser can and can be used again in other recipes.
Caution about Rough Chemicals and Preservatives.
Dyes, stabilisers, synthetic fragrance, and surfactants are common to the store-bought options. They do not necessarily make them bad, yet sensitive or reactive skin is fussy. DIY will help you avoid potential irritants, reduce fragrance, and avoid unnecessary additives — particularly helpful when you are dealing with dryness, redness, and acne flare-ups.
Table of Contents
Understanding Your Skin Type for Custom Cleansers
How to Tell – Oily, Dry, Combination, Sensitive, Acne-Prone
- Oily: Slick in the summer with large pores, and makeup slide off.
- Dry: Squeegee dry, flaky, dull.
- Combination: Oily T-zone, normal-to-dry cheeks.
- Sensitive: It is easily reddened/stings, sensitive to fragrance/strong actives.
- Acnes-Prone: Poisonous outbreak, plugged pores, swelling.
Find Your Perfect Match of Ingredients for Your Skin
- Oily/Acnes Prone: Clays (kaolin/bentonite/Multani mitti), tea tree, witch hazel hydrosol, aloe.
- Dry: Oats, honey, milk/yogurt, squalane or jojoba, gentle syndet bases.
- Sensitive: Aloe, chamomile, rice flour, oatmeal, fragrance-free approach.
- Combination: Apply Multani mitti on the T-zone and rose water to balance and perform dual-phase cleansing.
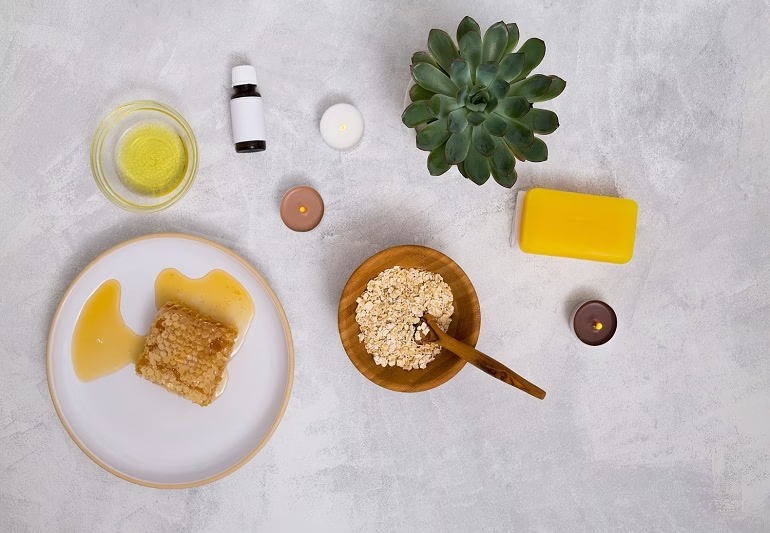
Essential Ingredients for DIY Face Cleanser
Natural Powders (Gram Flour, Oatmeal, Rice Flour, Clay)
- Gram flour (besan): Gently cleanses and brightens.
- Oatmeal (ground): An irritant calmer, softens the skin.
- Rice flour: Soft polish, which assists in removing excess oil.
- Clays (kaolin, bentonite, Multani mitti): Absorb sebum and impurities.
Carrier Oils (Jojoba, Almond, Coconut, Grapeseed)
- Jojoba: Skin-mimicking wax ester; non-greasy feel.
- Almond: Nourishing for dry skin; rich in fatty acids.
- Coconut: Occlusive; better for body or dehydrated patches.
- Grapeseed: Lightweight; great for oily/combination types.
Essential Oils (Tea tree, Lavender, Geranium) + Safety
- Tea tree: Clarifying for blemish-prone skin.
- Lavender: Calming for sensitivity and stress.
- Geranium: Balancing for combination/oily
Safety first: Keep total essential oils at ~0.5-2% of your formula (about 1-6 drops per 2 teaspoons/10 mL of carrier). There are citrus oils that may be phototoxic to sun-exposed skin- always patch test.
Additives (Honey, Yogurt, Aloe, Milk, Rose Water)
- Honey: Moisturizer; attracts water.
- Yogurt/Milk: Gentle lactic acid for softness.
- Aloe vera gel: Soothing hydration.
- Rose water: Mildly astringent; refreshes and balances.
DIY Face Cleanser Recipes by Skin Type
DIY Face Cleanser for Oily Skin
- Clay & Tea Tree Cleanser
You’ll require: 1 tbsp kaolin or Multani mitti, 1 teaspoon aloe gel, 1-2 teaspoons rose water, and 1-2 drops tea tree essential oil.
The way to use it: Blend into a cream form. Massage onto damp skin for 30-45 seconds. Rinse with cool water. Use 1-2x daily (AM without tea tree in case you are extremely sensitive).
- Oily-Skin Powder Cleanser
You’ll require: 1 tbsp rice flour, 1 tbsp gram flour, 1/2 tsp kaolin clay.
The way to use it: Keep dry. To bathe, moisten hands with 1/2 tsp powder, and rub into a soft paste with water or rose water. Massage gently and rinse. Great for travel.
DIY Face Cleanser for Dry Skin
- Milk & Oatmeal Cleanser
You’ll need: 1 tbsp finely ground oats, 2-3 tbsp milk (or oat/almond milk), and 1/2 teaspoon honey.
Usage: Rub onto the skin for one minute. Rinse with lukewarm water. The skin will feel cushy and calm.
- Hydrating Foaming Cleanser
You will need: 2 tbsp unscented plain liquid castile or syndet base, 1tbsp aloe gel, 1tbsp glycerin, and 5 drops lavender essential oil.
Usage: Add to a foaming bottle. One pump is enough. Rinse thoroughly. Follow with a hydrating toner/serum.
DIY Face Cleanser for Sensitive Skin
- Aloe & Chamomile Cleanser
You’ll need: 2 tbsp of aloe vera gel, 1 tbsp of chamomile hydro-sol (or cold tea) and 1 tsp of glycerin.
Usage: Use a thin layer, rub into the skin and wipe with soft, damp cotton or rinse -minimal fragrance, maximal comfort.
- Gentle Oil Cleansing Method
You’ll need: 2 tsp jojoba + 1 tsp grapeseed.
Usage: Rub on the dry face for 60-90 seconds. Place a warm (not hot) and damp cloth on your face and wipe. Repeat once. This elevates makeup and sunscreen; do not strip.
DIY Face Cleanser for Acne-Prone Skin
- Turmeric, Honey & Gram Flour Cleanser
You’ll need: 1 tsp gram flour, 1 tsp honey, a pinch (indeed a pinch) of turmeric, and paste with water.
Usage: Massage for 30-45 seconds. Rinse well. Turmeric is a staining substance- apply sparingly and wipe away.
- Essential Oil Spot-Cleansing Tips
You’ll need: Combine 1 drop of tea tree with 1 teaspoon of aloe gel and apply only to congested areas.
Usage: Use once a day to begin with, and don’t overapply.
DIY Face Cleanser for Combination Skin
- Multani Mitti & Rose Water Cleanser
You’ll need: 1 tbsp Multani mitti, 2 tsp rose water, 1/2 tsp aloe gel.
Usage: Use primarily on the T-zone; apply a creamier cleanser on the cheeks. Rinse after 45 seconds.
- Dual-Phase (Oil + Powder) Routine
Step 1 (PM): Oil cleanse (jojoba + grapeseed).
Step 2: Cleanse with a powder cleaner of rice/gram flour to remove of the leftover oil. This combination keeps the T-zone free and cheeks comfortable.
DIY Face Cleanser for Men
- Charcoal + Tea Tree Deep Cleanser
You’ll need: 1 tsp of activated charcoal powder, 1 tbsp of kaolin clay, 1 tsp of aloe gel, 1-2 tsp water, 1 drop of tea tree oil.
Usage: Rub into the beard region as well; wash and dry completely to prevent left behind on the hair on the face. Apply 3-4 times a week (no more than a day) to avoid drying.
DIY Face Cleanser with Essential Oils
Choosing the Right Oils-
– Acne & congestion: Tea tree (sparingly), geranium.
– Redness & stress: Lavender, German chamomile (in hydrosols or extracts).
– Balancing combo skin: Geranium can be used to even the feel of the skin.
Safety- Dilution & Patch Testing
Maintain the presence of essential oils at 0.5-2% of the cleanser.
Patch test: Place a small patch of the substance behind the ear or on the inner forearm for 24 hours.
Avoid phototoxic citrus oils on leave-on or day-use cleansers.
It is advisable to consult a professional before using essential oils when pregnant/nursing or addressing certain medical issues.

DIY Face Cleanser Powder-How & Why?
- Advantages of Powder Cleansers
Powders are the dream of a minimalist: they require no water (fewer preservatives are required), they last long on the shelf when they are dry, they can be transported with ease, and they can be infinitely customised. Wet/juice (add some water, rose water, or even milk to give it an extra kick).
- Two Powder Cleanser Recipes
- Bright & Soft Rice-Besan Blend
Mix: 2 tbsp rice flour + 1 tbsp gram flour + 1/2 tsp kaolin.
Use: 1 tspful, with some drops of water or rose water; massage and rinse.
- Oat-Soothe Sensitive Powder
Dissolve: 2tbsp colloidal oatmeal, 1 tsp rice flour.
Use: Turn on with chamomile tea, cooled or pure water. Gentle enough for daily use.
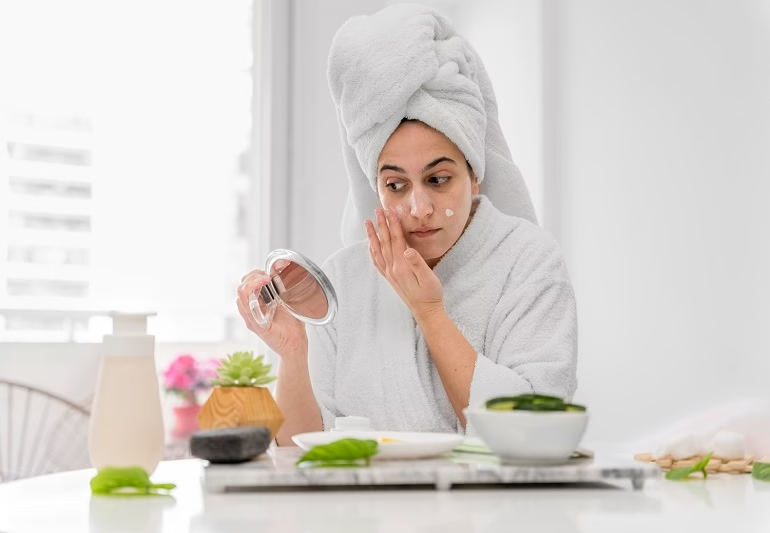
How to DIY Face Cleanser- Step-by-step
Basic Equipment
– Clean glass bowl and spoon/spatula (non-metal for clays).
– Measuring spoons.
– Clean, airtight container (pump/flip-cap for liquids; shaker jar for powders).
– Labels (date + recipe name).
Mixing, Packaging & Storing
Sanitize: Wash hands, tools, and containers. Let them air-dry completely.
Take Action: You must do things as the recipes say; adjust afterwards.
Blend: For powders, whisk until lump-free. For liquids/gels, add water-based ingredients first, then oils, essential oils should be added respectively.
Package: Move without handling the interiors of containers.
Label: Note date and ingredients. Future-you will thank you.
Tips for Longevity & Freshness
– In recipes that use water, use distilled or boiled-then-cooled water.
– Prepare in small batches (1-2 weeks water-based; 2-3 months powders stored dry).
– Keep refrigerated aloe- or dairy-based cleansers; dispose of them when there is a change of smell/texture.
– Do not put wet fingers into jars, pour or use a spatula.
Customizing & Troubleshooting Your DIY Cleanser
Swaps for Allergies/Reactions
Nut allergy? Substitute almond with jojoba or grapeseed.
Dairy-free? Swap milk/yogurt with oat milk or coconut yogurt.
Essential oil sensitive? Avoid fragrance, add hydrosols or water.
Boosting with Antioxidant, Botanical
To add a mild antioxidant flavour to a water-based recipe, add green tea (cooled).
Mix in aloe for a soothing slip.
It can be brightened up with a sprinkle of licorice root powder (1/4 tsp per 2 tbsp), which you can add slowly.
Q&A: Storage & Spoilage Signs
How long does it last? Powders: best not more than 2-3 months when dry. Water/ aloe/milk cleansers: 1- 2 weeks refrigerated.
Spoilage signs? Off smell, change of colour, separation, which do not recombine, fizzing, and observable mould. When in doubt, throw it out.
Can I add preservatives? A broad-spectrum cosmetic preservative and a pH check will be necessary to achieve a longer shelf life for water-based cleansers. In case that sounds complicated, use small, fresh batches or powders.
Common Pitfalls and How to Avoid
- Over-exfoliating: Rice/gram flour feels soft, but daily vigorous scrubbing may be irritating. Physical exfoliation should be gentle; most people need between 2 and 3 times per week.
- Excessive essential oil: A dab will do you respect dilution guidelines.
- Misuse of storage: Water is a microbe attractant. Use clean tools and small batches.
How do you know when to stop or visit a dermatologist?
When you do notice that you are persistently burning, extremely dry, or have worsening acne or a rash, stop. Such chronic conditions as severe acne, eczema or rosacea should also be the concern of a dermatologist- DIY will not substitute professional care, but rather complement it.
Conclusion
Making your face cleanser is like blending a smoothie for your skin–you can choose what to use, how thick or thin it will be, and how good it will taste. You can calm the irritation down with aloe, mix up oil and clay, or cleanse and soothe with oats and milk, but DIY controls you. Use fresh, small batches, keep safety in mind and gradually make amendments. Perfection is not required-it is a good routine that works on your skin.
FAQs About DIY Face Cleansers
1. What is the shelf life of homemade face cleansers?
Dry powders: normally 2-3 months when dry. Water- or aloe-based:~1-2 weeks refrigerated.
2. Which essential oils are safest for beginners?
Lavender and tea tree (properly diluted)are common starters. You may also forego the use of essential oils.
3. Any vegan or cruelty-free alternatives?
Use plant milks instead of dairy and maple syrup/glycerin instead of honey.
4. Can homemade cleansers replace store-bought products?
Yes, a lot of people change successfully. Go basic, keep a check on your skin and modify.